Introduction
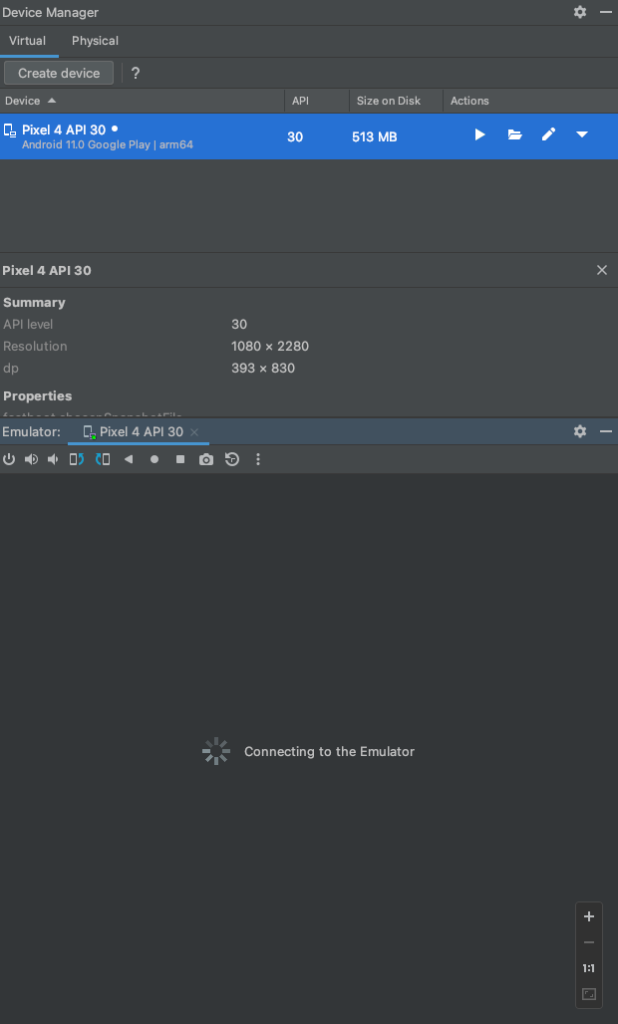
Android Studio is the go-to integrated development environment (IDE) for Android app developers. It offers a suite of powerful tools to create, test, and deploy Android applications seamlessly. However, like any complex software, it may encounter issues from time to time. One of the frustrating problems developers face is the ‘Connecting to Emulator’ stuck issue, where the Android Studio struggles to establish a connection with the emulator, hindering the app testing process.
The first step in troubleshooting the ‘Connecting to Emulator’ issue is to ensure that the emulator is set up correctly. Confirm that the installed Android SDK and emulator versions are compatible. Mismatched versions may cause connectivity problems.
The provided text outlines four solutions to address the issue of the Android Studio emulator being stuck at the “Connecting to Emulator” stage. Let’s break down each solution step by step:
Solution 1: Stop Emulator from AVD Manager
- Launch Android Studio.
- Click on “Tools” in the top menu bar.
- Select “Android” from the drop-down menu.
- Choose “AVD Manager” from the sub-menu.
- In the AVD Manager window, you will see a list of virtual devices (emulators) you have created.
- Right-click on the emulator that is currently stuck or experiencing the issue.
- From the context menu, choose “Stop” to terminate the emulator.
Solution 2: Wipe Image
- Open Android Studio.
- Click on “Tools” in the top menu bar.
- Select “Android” from the drop-down menu.
- Choose “AVD Manager” from the sub-menu.
- In the AVD Manager window, locate the emulator that is causing the problem.
- Right-click on the emulator name.
- From the context menu, select “Wipe Data.”
- Confirm the action when prompted.
- Try running the emulator again after it has been wiped.
Solution 3: Uninstall and Reinstall AVD
- Launch Android Studio.
- Click on “Tools” in the top menu bar.
- Select “SDK Manager” from the drop-down menu.
- In the SDK Manager window, click on the “SDK Tools” tab.
- Locate “Android Emulator” in the list of SDK tools.
- Uncheck the box next to “Android Emulator” to uninstall it.
- Click on the “Apply” button to initiate the uninstallation process.
- Once the emulator has been successfully uninstalled, check the “Android Emulator” box again.
- Click on “Apply” to reinstall the emulator.
- Try running the emulator again after the reinstallation.
Solution 4: Coldboot
- Go to the Device Manager (this is within the AVD Manager).
- Find the virtual device (emulator) that is currently stuck or experiencing the issue.
- Right-click on the virtual device’s name.
- From the context menu, select “Cold Boot Now.”
Explanation:
The provided solutions address the common causes of the “Connecting to Emulator” issue in Android Studio. Often, the problem can be resolved by stopping the emulator, wiping its data to start with a clean slate, or reinstalling the Android Virtual Device (AVD) components. Additionally, performing a cold boot on the virtual device can help resolve certain issues related to its state.
Keep in mind that the effectiveness of each solution may vary depending on the specific situation and the underlying cause of the problem. If one solution does not work, it is recommended to try the other solutions until the issue is resolved. Remember to save any important data or changes within the emulator before performing actions like wiping data or reinstalling the AVD, as these actions will reset the emulator to its default state.