If you encounter a message stating that your project is using an unsupported version of Gradle in Android Studio, it means that the version of Gradle specified in your project is either too old or too new for the version of Android Studio you are using. This often happens when you import a project from a different version of Android Studio or when there’s an update to Android Studio itself.
To resolve this issue, you need to update your project’s Gradle version to a compatible one
Open the build.gradle file: In your Android Studio project, navigate to the root folder of your project and find the build.gradle file.
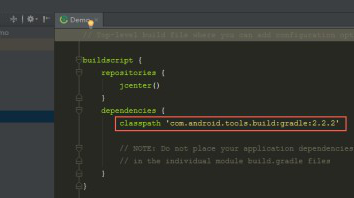
Update Gradle version: In the build.gradle file, look for the classpath dependency for Gradle. It will be in the buildscript section, and it will look something like this
buildscript {
    repositories {
        // ...
    }
    dependencies {
        classpath 'com.android.tools.build:gradle:OLD_GRADLE_VERSION'
    }
}
Replace OLD_GRADLE_VERSION with a compatible version of Gradle. You can find the latest Gradle version supported by Android Studio on the Gradle Plugin Release Notes page: https://developer.android.com/studio/releases/gradle-plugin
Sync Gradle: After updating the Gradle version, Android Studio will prompt you to sync the project. Click on the “Sync Now” button to apply the changes.
Update Gradle Wrapper (Optional): Additionally, you might see a message to update the Gradle wrapper. If so, you can click on the “Update” link or follow the instructions provided to update the Gradle wrapper to match the new Gradle version. After updating the Gradle version and syncing the project, the “unsupported version of Gradle” error should be resolved. However, keep in mind that updating the Gradle version may require updating other dependencies and build configurations in your project. So, you might need to adjust other parts of your project accordingly to ensure everything works smoothly.