The “FAILURE: Build failed with an exception” error in Android Studio is a generic message that indicates there was an issue during the build process of your Android project. This error can be caused by various factors, such as configuration errors, dependency conflicts, or issues with the project files.
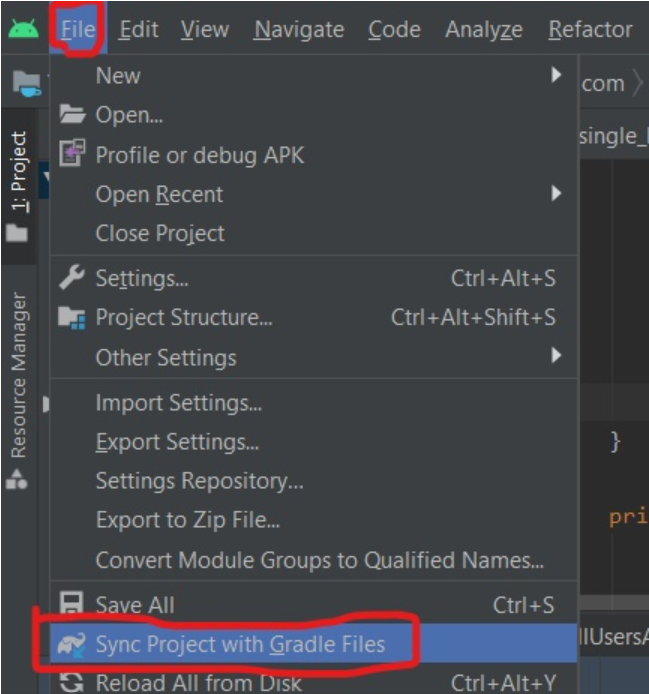
In Android Studio, navigate to the “Build” or “Messages” window to view the full build output. This window contains detailed information about the build process, including any error messages and stack traces. Analyze the output to understand the cause of the failure. Gradle is the build system used by Android Studio. Sometimes, issues can arise due to inconsistencies between project files and Gradle configurations. To resolve this, go to File > Sync Project with Gradle Files or click the “Sync Project” button in the toolbar. This action ensures that your project files are in sync with the Gradle build system.
Conflicting dependencies or outdated library versions can cause build failures. Review your project’s build.gradle files and ensure that all dependencies are compatible with each other and up to date. You can use the “Gradle” tab in Android Studio to navigate to the specific build.gradle files.
Sometimes, build artifacts or caches can become corrupted, leading to build failures. Go to Build > Clean Project and then Build > Rebuild Project to clean the project and rebuild it from scratch. This action will regenerate all the build artifacts.
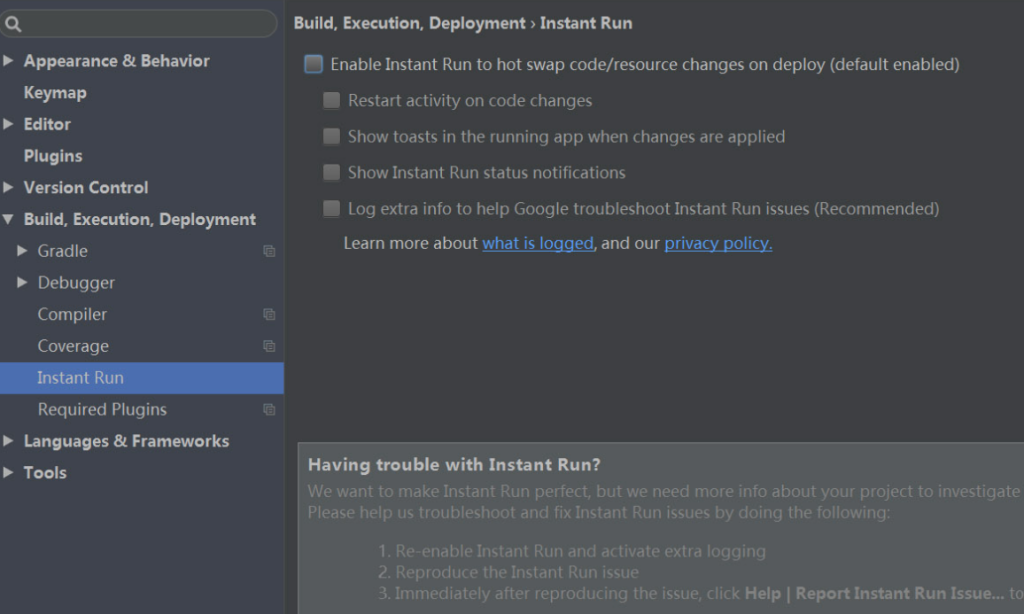
If you are using Android Studio 3.0 or above, consider disabling Instant Run during debugging, as it can sometimes cause build issues. Go to File > Settings > Build, Execution, Deployment > Instant Run and uncheck the “Enable Instant Run” option.
Verify that you have installed the correct SDK versions and API levels required by your project. You can do this in the SDK Manager within Android Studio.
If you have enabled R8 for code obfuscation, review the configurations in the proguard-rules.pro or android/app/build.gradle files. Incorrect configurations can cause build failures. Make sure you are using the latest version of Android Studio and Gradle. Updates often come with bug fixes and improvements that may resolve build-related issues.