Using a webcam with the Android Emulator allows developers to test camera features efficiently. Here’s how to set it up in a few easy steps.

1. Open Device Manager in Android Studio
- Launch Android Studio.
- Go to Tools > Device Manager.
- Select the virtual device you want to edit and click on the pencil icon (Edit button) as shown below.

2. Configure Camera Settings
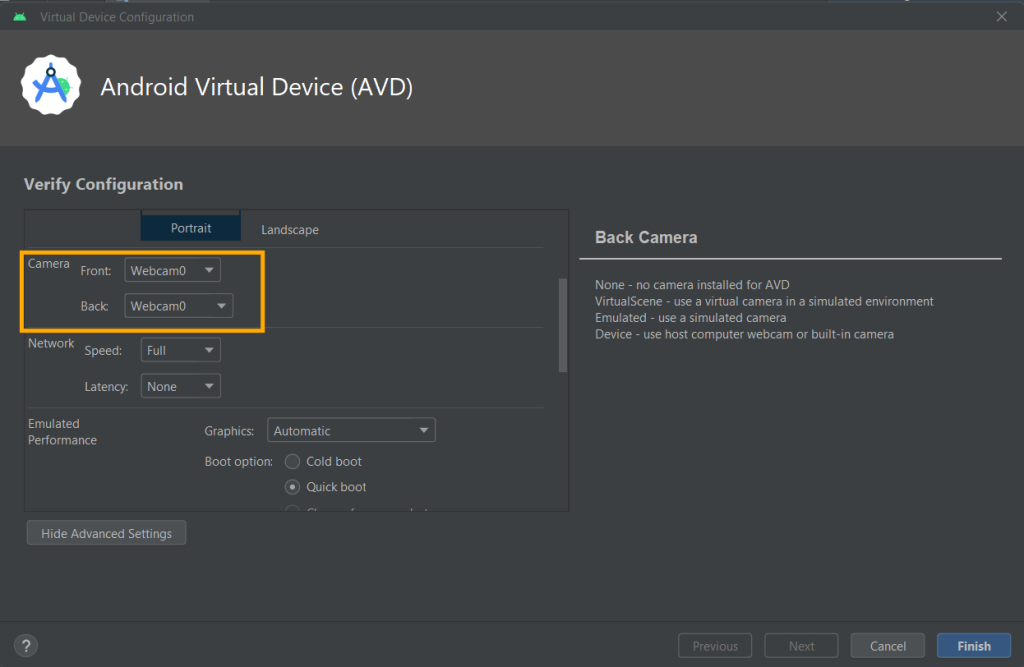
- In the Verify Configuration screen, find the Camera section.
- For Front Camera and Back Camera, choose from the following options:
- None: No camera configured.
- Emulated: Simulated camera (default).
- VirtualScene: Use virtual camera environments.
- Webcam: Connect to your computer’s webcam.
To use your webcam:
- Select Webcam0 for either Front or Back Camera.

3. Apply and Save Changes
- Click Finish to save your configuration.
- Relaunch the Android Emulator to apply the changes.
4. Verify Camera in the Emulator
- Open any app that uses the camera.
- Ensure your webcam feed is visible and working.
Troubleshooting Tips
- If the webcam doesn’t display, ensure no other app is using the camera.
- Restart the emulator and Android Studio.
- Verify your webcam is enabled in your system settings.
With these simple steps, you can connect your webcam to the Android Emulator and test real-world camera scenarios seamlessly!
\